

Search our help centre
The back office training user guide to managing all of your payments easily and securely in one place through the hosted payment solution.
To access the back office, go to the login URL: https://portal.eu.convergepay.com
You will be presented with the login box:

Enter the email address that you used to register for an account.
Enter your password and click ‘Log In’
(This field is case sensitive)
You’ll then be directed to another screen and asked to enter a 6-digit one-time passcode, as part of our secure login process using multi-factor authentication.
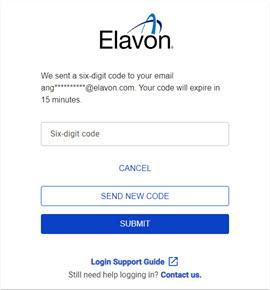
A one-time passcode will be delivered to the email address associated with your user account.
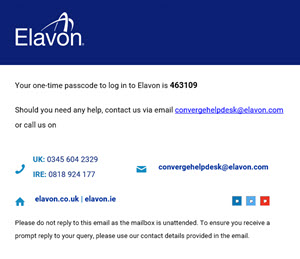
The email will come from noreply@elavon.com with the subject “Elavon Login Verification Code”.
The passcode is only valid for 15 minutes. If you do not use the passcode within this period, you’ll need to generate a new one.
If you do not receive an email with the passcode or the 15-minute period has expired, click ‘Send New Code’ to receive a new passcode.
Once you have entered your passcode, click ‘Submit’ to complete the login process
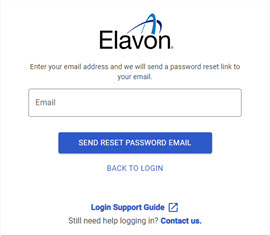
If you have forgotten your password, you can click ‘Forgot Password’ to request an email to your registered account to reset it:
You will receive:
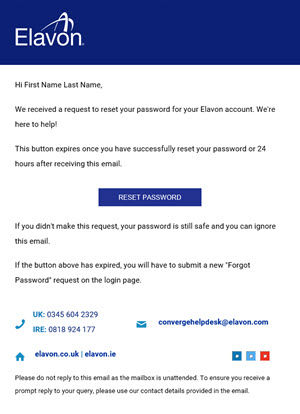
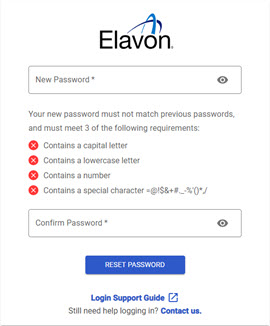
Click the ‘Reset Password’ button to be taken to a password reset screen where you can create a new password as per the secure password requirements:
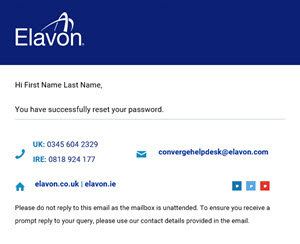
Once you have reset your password, you’ll receive the following confirmation email:
When you enter the back office, the Payments screen is displayed:
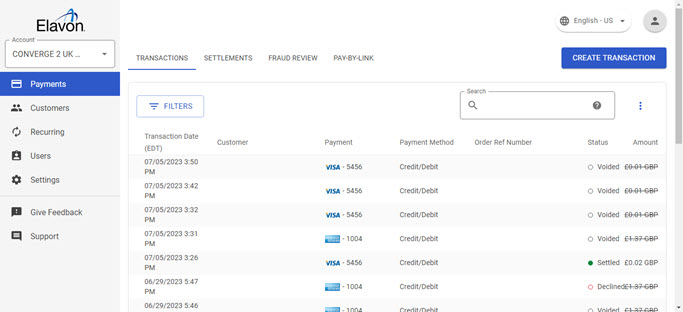
This is your home screen, and from here you can navigate to other areas of the back office via the menu on the left-hand side (according to your level of access).
Your most recent transactions are displayed in a list format, showing:
- The date and time of a transaction
- The shopper name
- The payment type and method
- The order number (if provided)
- The status of the transaction
- The amount and currency of the transaction
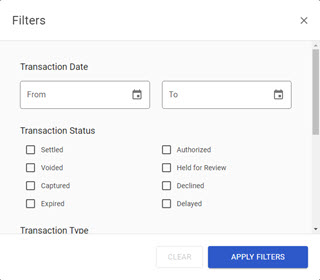
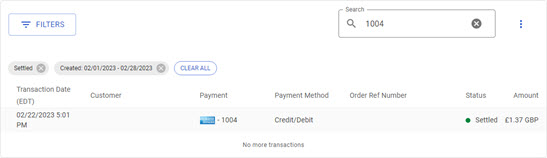
2.1. Filtering transactions
Click the ‘Filters’ button on the ‘Transactions’ screen to narrow down your list of transactions according to one or more criteria. You can filter by:
- Transaction Status
- Transaction Type (sales or refunds)
- Payment Method
- Source (virtual terminal, hosted payment, direct API call, recurring, pay-by-link)
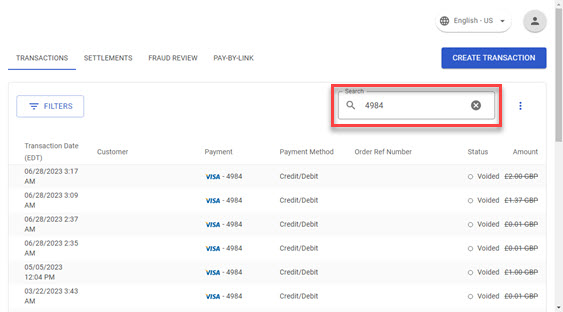
2.2. Searching transactions
You can use a free text search criteria to search for one or more transactions using the search option in the ‘Transactions’ screen – for example, entering the last four digits of a card number will return all transactions with that card number:
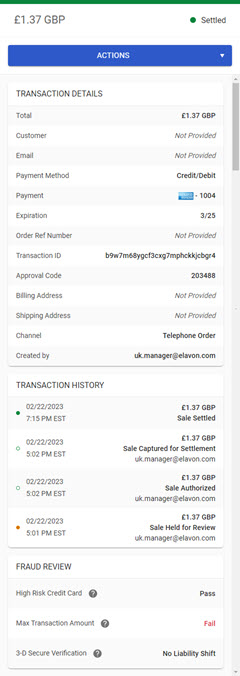
2.3. Interrogating individual transactions
Click on a transaction in the transactions list to display additional details:
2.4. Cancelling a transaction
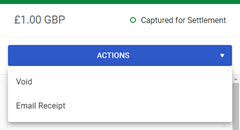
You can cancel a transaction, known as a void, if it is in an ‘Authorised’ or ‘Captured for Settlement’ status and has not yet been settled. To cancel a transaction:
- Click on the transaction in the Transactions list to display the transaction details
- Click ‘Actions’
- Click ‘Void’:
Confirm that you wish to void the transaction by clicking ‘OK’:
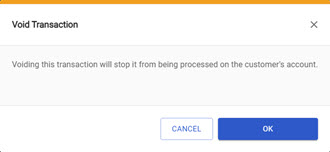
The status in the Transactions list will change to Voided.
2.5. Refunding a transaction
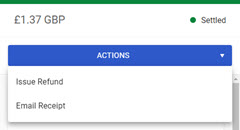
You can fully or partially refund a transaction if it is in a ‘Settled’ status. To refund a transaction:
- Click on the settled transaction in the transactions list to display the transaction details
- Click ‘Actions’, then ‘Issue Refund’:
Click ‘Process Refund’ to refund the full value of the transaction.
If you only wish to refund a partial amount of the total transaction value, click into the ‘Amount’ box and type the amount you wish to return to the customer.
At this stage you can also choose to email a refund receipt to the customer:
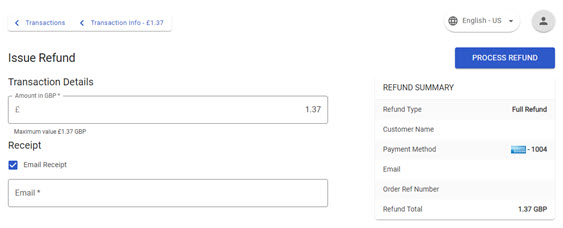
A new transaction will appear in the Transactions table to show the refund with the status Captured for Settlement until the refund has been successfully settled.
2.6. Downloading transactions (reporting)
It is easy to download transaction data to a CSV file, which you can then import into your reporting tool or spreadsheet to perform reconciliation or further analysis.
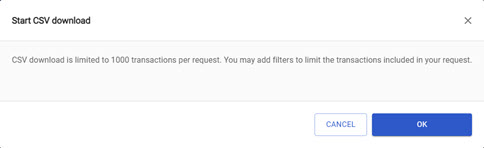
Click the three vertical dots at the top right on the transactions table and select ‘Download to CSV’ to download the Transactions list (or a subset of transactions if you have already filtered the list):
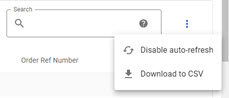
The maximum number of transactions that you can download is 1000 – if you do not apply a filter, the download will contain your 1000 most recent transactions.
Click ‘OK’ to start the file download:
- Open the CSV file in your preferred reporting tool.
- Click the ‘Settlements’ tab to display a list of all the batches of settled transactions on your account
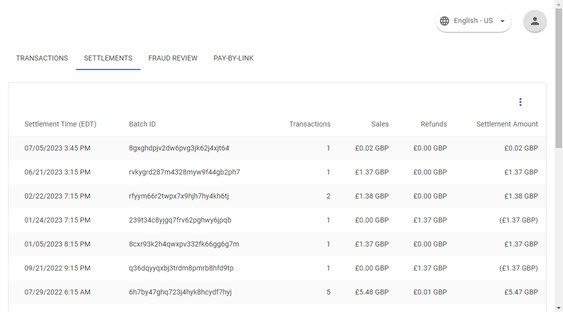
- Click on an individual settlement in the list to display the transactions within that batch:
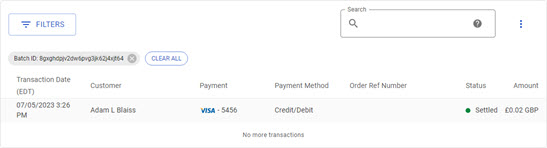
You may then view the individual transactions in a batch, filter the transaction list, and download those transactions in a CSV file for reporting, as previously detailed in the Managing Payments section.
You can process MOTO (Mail Order/Telephone Order) transactions directly in the back office using the Virtual Terminal. All MOTO transactions will appear in the transactions list and can be managed in the same way as your ecommerce transactions.
4.1. Process a New MOTO Transaction
Click the ‘Create Transaction’ button in the top right-hand corner of the ‘Transactions’ screen to display the new transaction window:

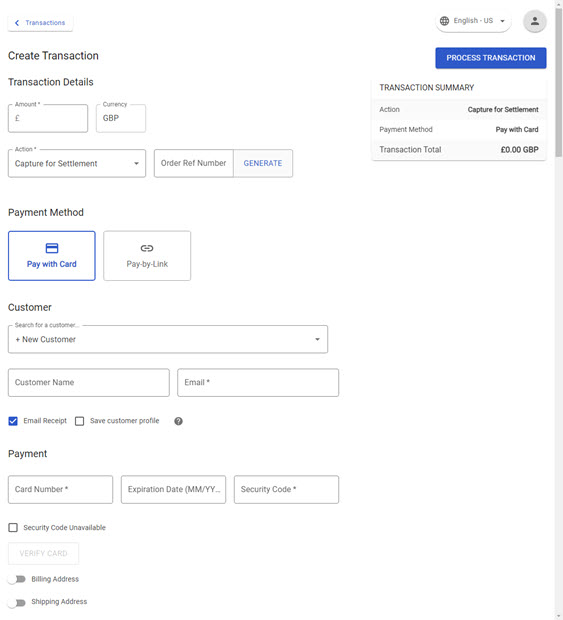
Enter the transaction details into the required fields:
- Amount: enter the transaction total
- Currency: select the currency from the drop-down list if presented
- Action: select the action from the drop-down list:
- Capture for Settlement: use this option if you want to authorise the transaction and also send it to for settlement in the next batch
- Authorise: use this option if you wish to only authorise the transaction and not send it for settlement – the transaction will need to be manually settled before the authorisation expires (typically 7 to 10 days after authorisation)
- Order number: a transaction order number (not mandatory, and can be auto generated)
- Payment details: card number, expiry date and security code · Email receipt: check the box to send a receipt to the customer’s email address
- More Options: customer billing and shipping address
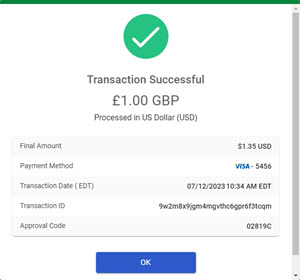
The details entered are copied into the summary screen on the right-hand side to enable you to confirm the transaction details with the customer before you process the transaction. Click ‘Process Transaction’ to confirm. You will then see confirmation of the transaction result, either transaction successful or transaction declined:
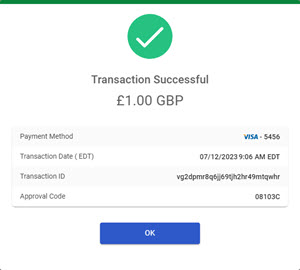
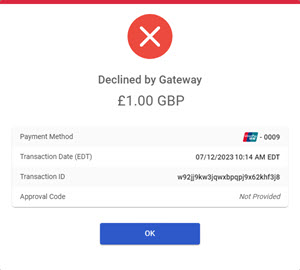
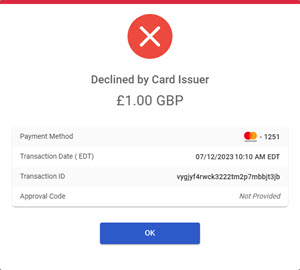
The transaction can be declined by the gateway (for example blocked by one of your fraud rules) or declined by the card issuer.
Click ‘Done’ to return to the Transactions list where you will now see the new transaction.
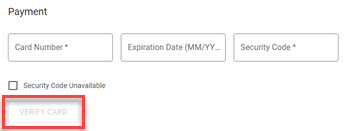
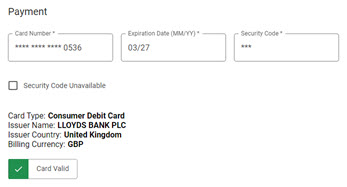
4.2. Verifying a Card
You can use the Verify Card option in the virtual terminal to confirm the validity of a credit or debit card by checking the card number, expiry date, security code and AVS data. The result of the authorisation request is returned in real-time, either confirming a successful transaction, i.e., confirmation that the card details are valid or declining the authorisation. There is no check on available funds or the credit limit of the card, so it does not validate that funds are present or guarantee any future payments.
- If the card is valid, you will see:
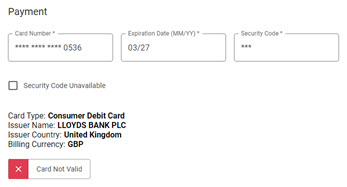
- Otherwise you will see:
4.3. Processing a Dynamic Currency Conversion (DCC) MOTO transaction
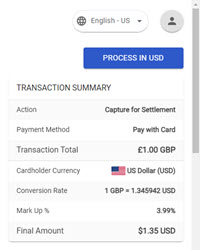
If you have DCC enabled on your account you can offer your customers a choice of currencies to pay in, either the preferred currency of your business or, where it is different, the currency enabled by default on the customer’s card (typically the customer’s domestic and preferred currency).
Begin the MOTO payment as described in the previous section of this guide. When the card number is entered, a message will appear to let you know if the card if enabled for DCC and, if so, the currency selection available. In this instance United States Dollar (USD) has been presented, the currency of the shopper’s card, as an alternative currency option.

You must ask the shopper which currency they wish to pay in to complete the payment.
Once a currency has been selected, the blue button will update with the chosen currency – for example ‘Process in USD’.
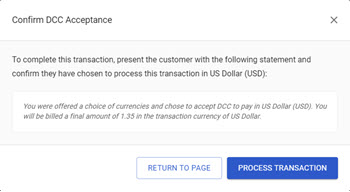
Read the DCC Acceptance statement out loud to the shopper before clicking ‘Process Transaction’
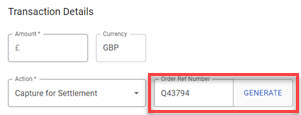
4.4. Generate an order number
If you wish to auto-generate a unique order number, simply click the ‘Generate’ button to the right of the field and a unique reference will populate:
You can send a payment link to your shoppers to avoid asking them to share sensitive card information over the phone. The link can be sent via email, or you may copy and paste it into an email, direct social media message, SMS, or similar. The shopper will click on the link to complete a secure transaction directly on the hosted payment page.
5.1. Enabling Pay by Link
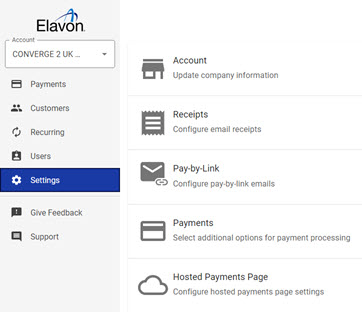
Select the ‘Settings’ option from the main menu
Go to ‘Pay-by-Link’

Set the Enable Pay-by-Link toggle to ‘Enabled’.
When disabled, the option to create payment links from the new transaction form is removed. Any outstanding and active payment links will remain active.

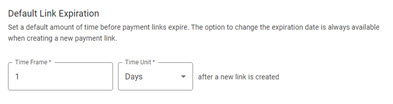
Optional: set a default link expiration if you want your payment link to expire within a specific timeframe – the default is 90 days.
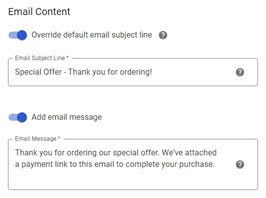
Optional: set a default email subject line if you want all your pay-by-link emails to have the same email subject line. You are able to edit or replace the default subject line each time you generate a new pay-by-link email.

You can also customise the look and feel of the Pay-by-Link Email Template.
5.2. Creating a Pay by Link transaction using the Converge email template
Click the ‘Create Transaction’ button in the top right-hand corner of the ‘Transactions’ screen to display the new transaction window:

Click ‘Pay-by-Link’
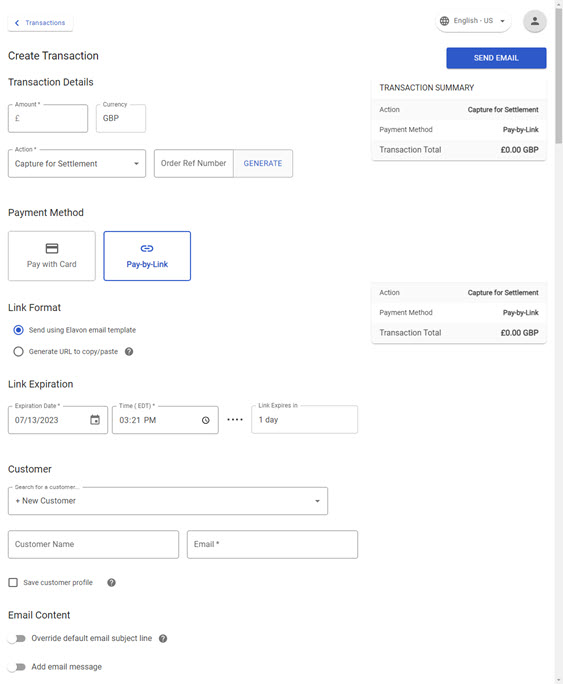
Select ‘Using the Elavon email template’ to send payment links via email directly from Elavon. Your default link expiry and email subject line settings will automatically be applied.
Click 'Send Email'
5.3. Generating a payment link
You can also generate a payment link URL which you can then paste into an SMS, add to social media, or paste into an invoice.
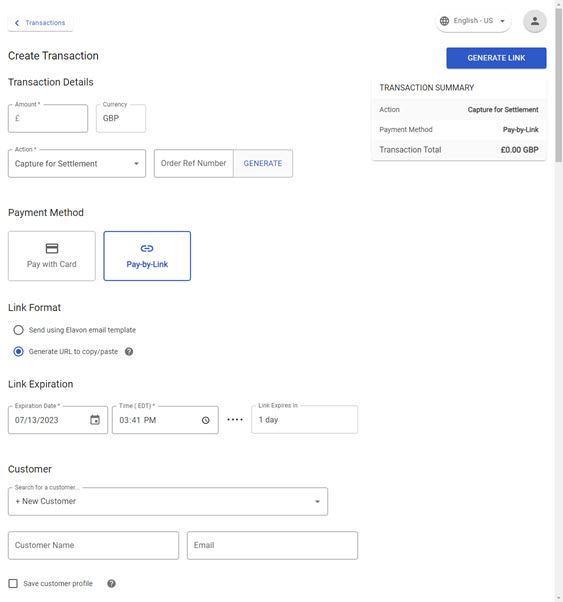
Enter the transaction details and select ‘Generate URL to Copy/Paste’.
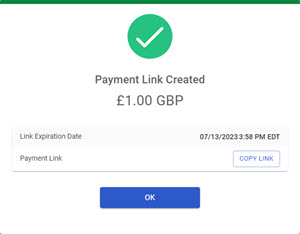
A confirmation box will appear, select ‘Copy Link’ to copy the link to your clipboard.
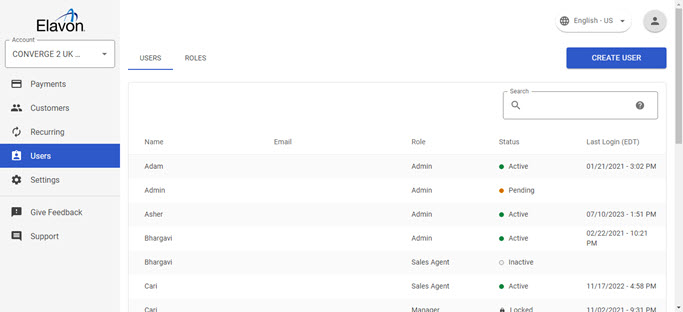
6.1. Create a new user
- Click the ‘Create User’ button:

Enter the new user credentials – the email address will need to be verified by the new user and will become their user name to log in:
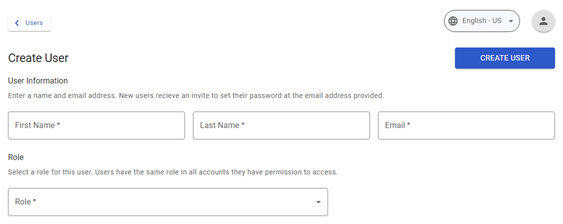
Select the required Role from the roles available:
- Manager – can view, process, and refund transactions and configure fraud rules
- Sales Agent – can view and process transactions
- Admin – can view, create, delete transactions, and modify all other user accounts
Click ‘Create User’ again
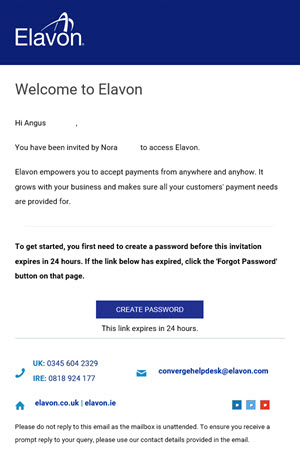
The user will receive an email with a link to login for the first time
6.2. Edit an existing user
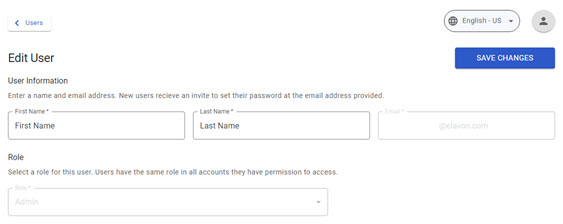
- From the list of users, select the user that you wish to modify, and click ‘Edit User’:
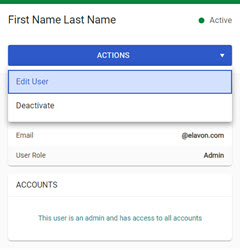
- You will have the option to edit the user’s name and their role, but it is not possible to change the email address as this is also their login ID.
When you have finished making changes, click ‘Save Changes’ to confirm:
6.3. Deactivate a user
If a user no longer requires access to the back office, you can deactivate their login.
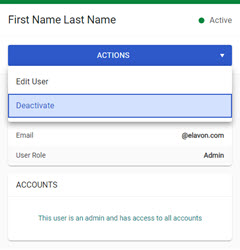
From the list of users, select the user, click ‘Actions’ and select ‘Deactivate’:
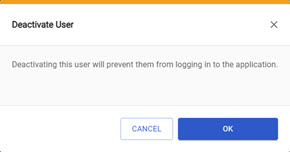
Confirm that you wish to deactivate the user by clicking ‘OK’:
7.1. Account settings
Click ‘Account’ to view your current Account Settings:
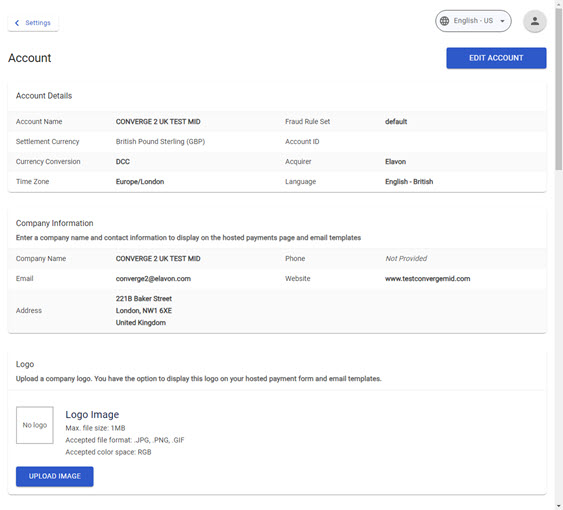
The company information is captured at the time of account setup and is not editable. If you need to make any changes to this, please contact your Elavon account manager and/or customer support.
You may wish to upload your company logo to display it on your hosted payment page
Click ‘Upload Image’:
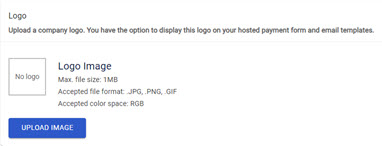
Select and open the image file you’d like to use.
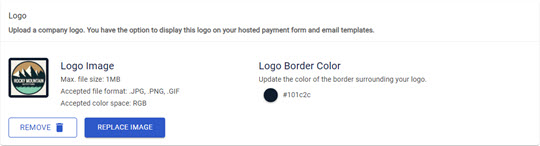
Your logo will now be displayed:
7.2. Receipt settings
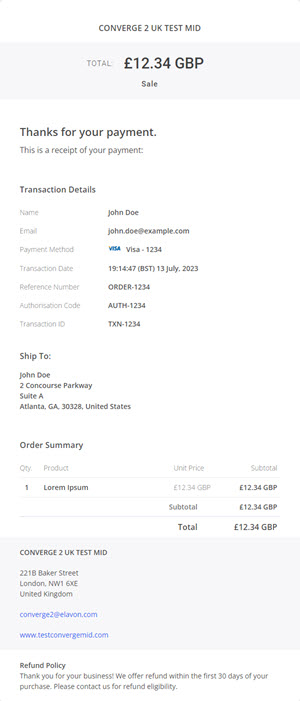
Click ‘Receipts’ to view your receipt settings and preview your receipt.

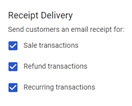
You can configure the ‘Receipt Delivery’ settings to select when you want to automatically send a receipt to your customers:
You can enter your own Refund Policy as per the example below, which will dynamically update in the Receipt Preview on the left:
- Toggle on BCC if you wish to send copies of shopper receipts to a different email address in blind copy:

- Toggle on Logo if you wish to display your company logo on the receipt:

7.3. Payment settings
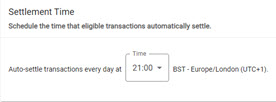
Select ‘Payments’ to configure the daily settlement time and set up currencies for MOTO transactions:
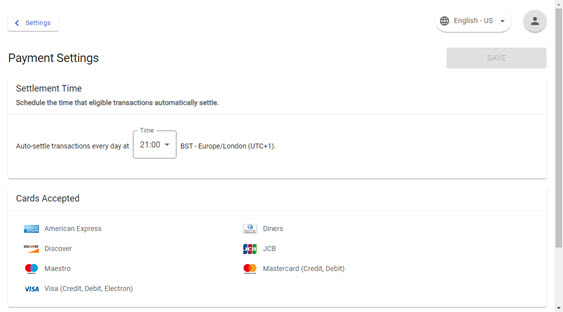
You can change the time to auto-settle your captured transactions by selecting a new value from the drop-down list:
You can add currencies that can be accepted for MOTO transactions in the virtual terminal, based on the set-up of your account with Elavon:
To add a currency, select a currency from the drop-down list and click ‘Add Currency’. Repeat for each currency you wish to add.
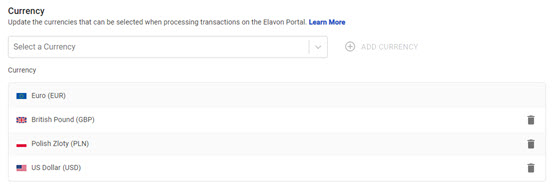
To remove a currency, click the delete icon corresponding to the currency and confirm your selection.
If you make any changes to your payment settings on this screen, make sure you select ‘Save’ before moving on to another screen.
You will need to contact the Converge support team if you wish to make changes to the ‘Cards Accepted’ list.
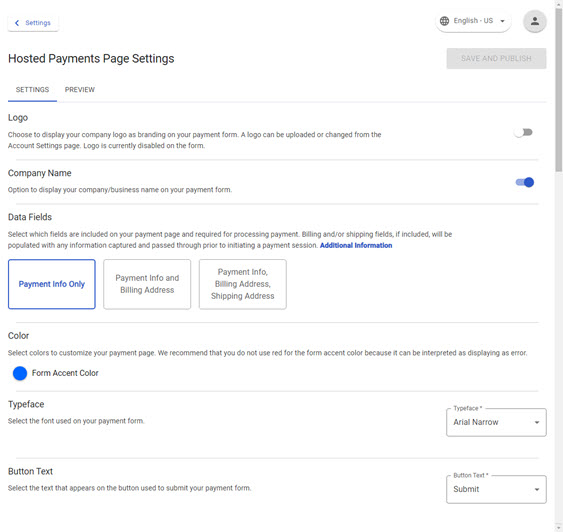
7.4. Customising the Hosted Payment page
Click ‘Hosted Payment Page’ to make changes to elements of the hosted payment page:
- Data Fields – select which fields you want to display on the hosted payment page:

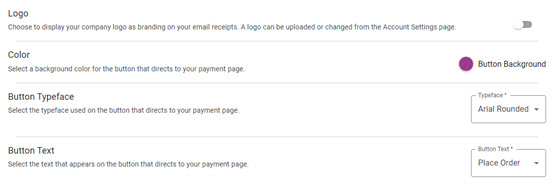
- Logo – use the toggle switch to enable this option to display your logo on the hosted payment page. This will display the logo you have already uploaded in Account Settings.
- Business Name – use the toggle switch to enable this option to display your company name (as per your account settings) on the hosted payment page
- Colours – click the colour symbol to change the colour of the Header, Header Text and Input Fields in line with the design of your website. You can select from the pre-defined list or enter your own Hex code.
- Typeface – use the Typeface drop-down list to select a different font.
- Button Text – use the Button Text drop down list to select a different message.
Make sure you click 'Save and Publish' to save your changes.


7.5. Fraud prevention
The built-in fraud prevention tools allow you to define block lists and configure rules to help mitigate the risk of fraud.
Please be aware that if a fraud rule triggers on a transaction made using a non-card payment type, e.g., online banking, that the transaction will decline even if the rule result is set to Review. These transaction types cannot be held for review.
Click ‘Fraud Prevention Rules’ to access the Fraud Management rules – you will notice that some rules are active by default. You may choose which rules to use and configure according to your business requirements:
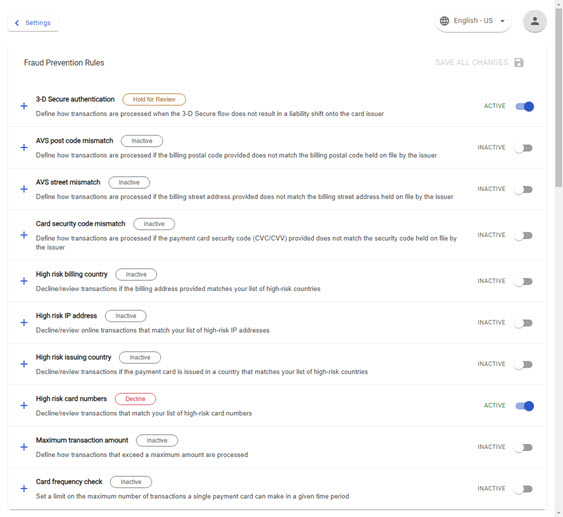
3-D Secure authentication – if you believe you have a business requirement to disable/set this rule to inactive, please be aware your business will be liable in the event of a chargeback. To turn off 3DS2, click on the rule to change the toggle switch to ‘Disable’.
Under the Second Payment Services Directive (PSD2) regulations, most ecommerce transactions throughout Europe will soon require Strong Customer Authentication (SCA). EMV 3DSecure is the industry standard method of providing SCA on card payments. By choosing to deactivate 3DS on your Converge account, you will be liable in the case of chargebacks raised by card issuers and at risk of having transactions declined by them. There may also be fines imposed by the card schemes (Visa and MasterCard) for excessive declined transactions.
- High risk billing country – use this rule to either Decline or Review (place in the Fraud Review transaction list) all countries added to the Blocklist. To define the Blocklist, select a country from the drop-down list and click ‘Add to Blocklist’. Repeat for each country you wish to block:
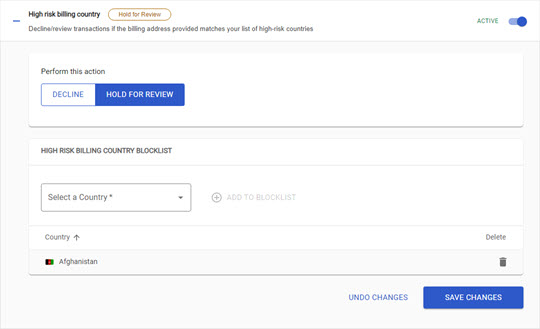
Select the country to block and click ‘Add’ – repeat for each country you wish to block then click ‘Apply’.
- To remove a country from the Blocklist, click the delete icon corresponding to the country and confirm your selection:
From the Rule Definition drop down, decide whether you wish to ‘Decline’ or ‘Review’ transactions where the Billing Country is in the Blocklist
- Remember to save your changes
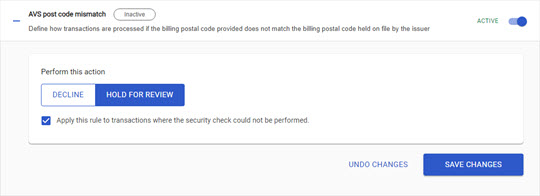
- AVS postcode mismatch – use this rule to either Decline or Review transactions placed using a card where the Billing Postcode does not match the postcode on file with the card Issuer or where the check cannot be performed. Only the numbers in the postcode are checked.
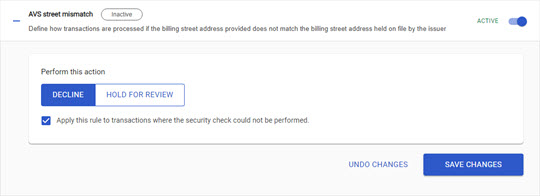
- AVS street mismatch – use this rule to either Decline or Review transactions placed using a card where the Billing Address Street does not match the billing address street on file with the card Issuer or where the check cannot be performed. Only the numbers in the street field are checked
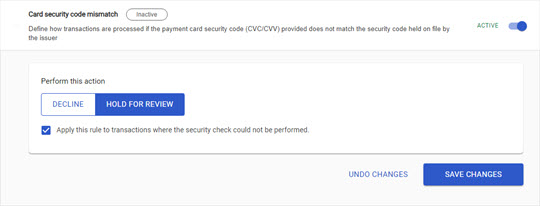
- Card security code mismatch – use this rule to either Decline or Review transactions where the CVV for a card provided by the customer does not match the CVV held on field by the card Issuer or where the check cannot be performed.
- High risk IP address – use this rule to either Decline or Review all transactions originating from IP addresses on the Blocklist. Build the Blocklist and define the rule as above.
- High risk issuing country – use this rule to either Decline or Review all transactions where a payment card’s country of issue has been added to the Blocklist. Build the Blocklist and define the rule as above.
- High risk card numbers – use this rule to either Decline or Review all transactions placed with a card number on the Blocklist. Build the Blocklist and define the rule as above.
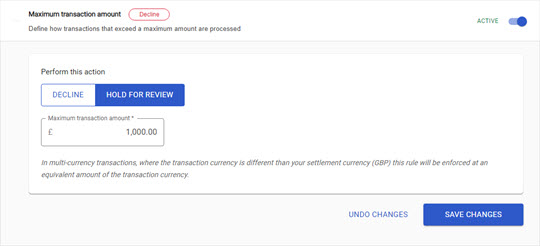
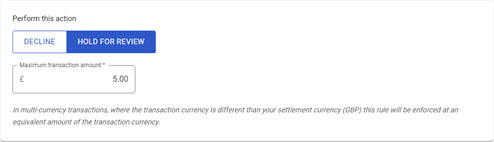
- Maximum transaction amount – use this rule to either Decline or Review all transactions that exceed the maximum transaction value – define the rule and enter the maximum amount
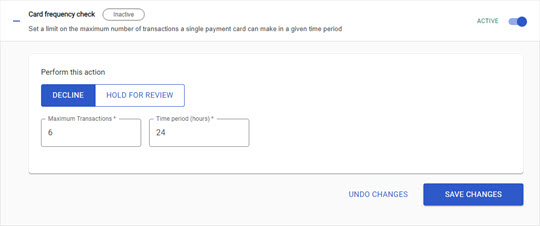
- Card frequency check – use this rule to either Decline or Review transactions where the same card has been used (with this merchant account) more than a specified number of times within a specified number of hours – define the rule and enter your required values for the ‘max transaction frequency’ and the ‘time frame’:
Fraud Review
Where a transaction has failed a fraud rule, and that rule has been set to ‘Review’, the transaction will be authorised, but not automatically captured. Instead, in addition to appearing in the Transactions list, it will appear in the ‘Fraud Review’ list.
Please be aware that if a fraud rule triggers on a transaction made using a non-card payment type, such as BLIK or online banking, that the transaction will decline even if the rule result is set to Review. These transaction types cannot be held for review.
To view transactions for review:
Select ‘Payments’ from the main menu
Select the ‘Fraud Review’ tab to display the list of transactions pending review.
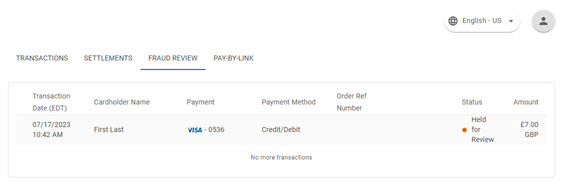
Click on the transaction in the Fraud Review list to display additional transaction details. At the bottom of the screen, you will see that in this example the transaction has failed the Max Transaction Amount fraud rule:

(The fraud rule was defined as below):
· You can now choose to ‘Approve’ or ‘Void’ the transaction:
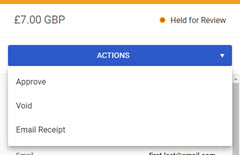
If you approve the transaction, it will be released from the review list and captured for settlement in the next settlement batch.
If you void the transaction it will be cancelled.
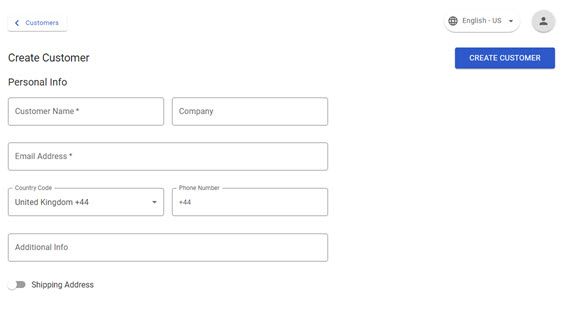
9.1. Creating a Customer
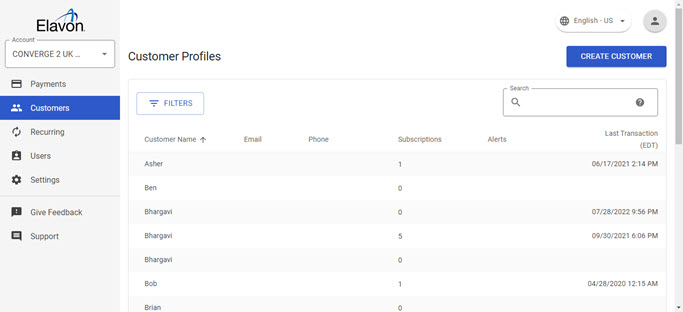
- Select the ‘Customers’ option from the main menu
Click ‘Create Customer’
- Enter the customer details and click ‘Create Customer’:
9.2. Storing Card Details
Select a customer profile, click ‘Actions’ and select ‘Add card’
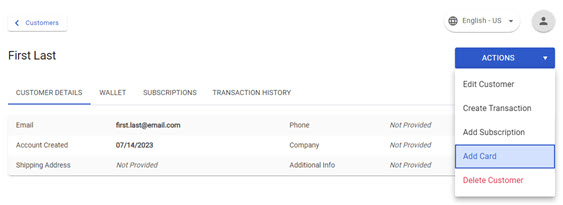
You can choose to capture the card details only, or the card details and the billing address:
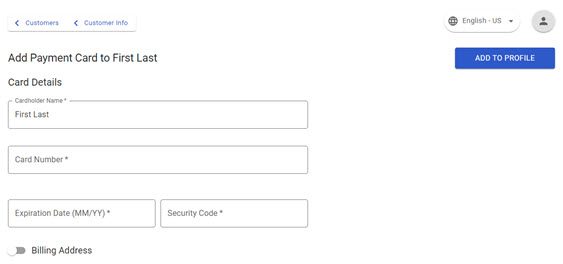
Click ‘Add to Profile’
9.3. Deleting a Customer
To delete a customer record, along with any stored cards, select a customer profile, click ‘Actions’ and select ‘Delete Customer’:
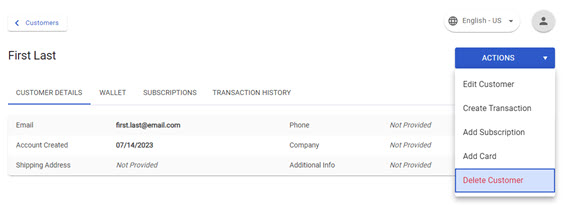
To confirm that you wish to delete the customer, click 'Yes':

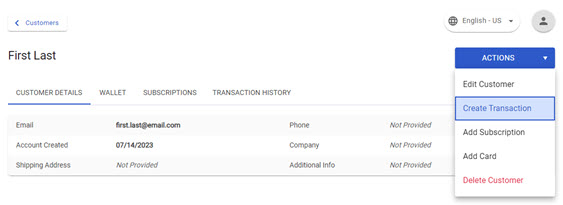
9.4. Processing a Transaction against a Stored Customer
- Select a customer profile and select ‘Create Transaction’ from the ‘Actions’ drop-down list:
- Enter the transaction details and select the stored card to use:
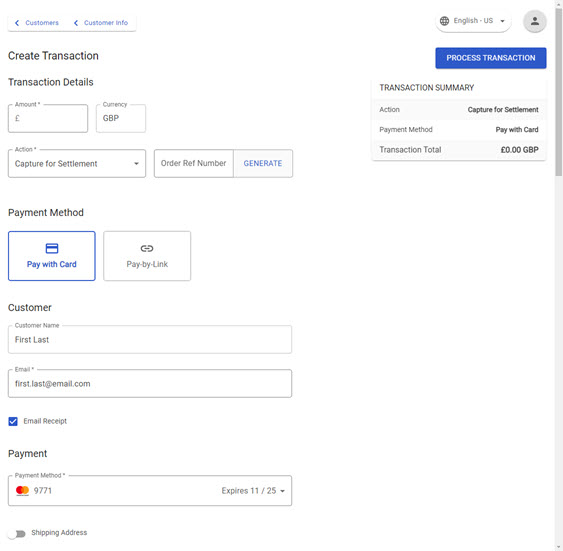
- Click ‘Process Transaction'
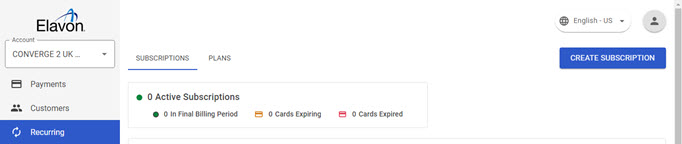
Recurring Payments
- By selecting the ‘Recurring’ option from the main menu, you will be able to create:
- Subscriptions – subscriptions periodically and automatically charge a customer’s credit or debit card and are created by applying a subscription plan to a customer with a card stored in their profile
- Plans – plans are the templates that you create and apply when you create a new subscription
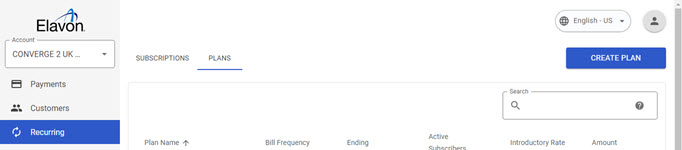
10.1. Creating a Plan
- Click 'Create Plan'
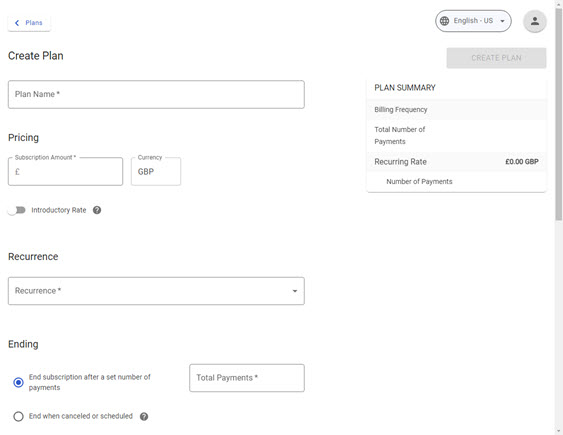
Enter the plan details:
- Plan name
- Subscription amount and currency
- Optional introductory rate – this will allow you to specify a different amount for the initial subscription payment(s) e.g., if you wish to offer an initial discounted rate
- Billing frequency – daily, weekly, monthly, or yearly
- Plan end date – you may configure the plan to end after a specific number of billing periods, when cancelled, or on a date specified within an individual subscription
Click ‘Create Plan’ and you will see your plan marked as Active in the plan list:
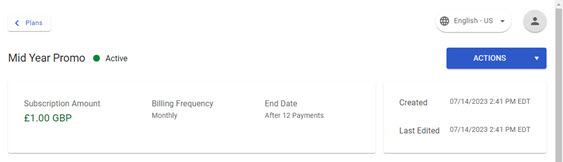
- You may now add subscriptions to your plan
10.2. Creating a Subscription
Click 'Create Subscription' and complete the details by assigning the relevant plan, the start date, and the customer it relates to:
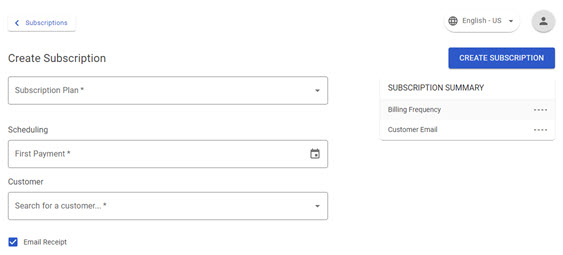
Click 'Create Subscription'.
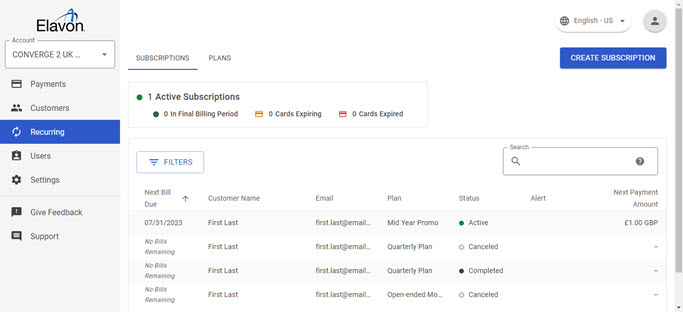
The new subscription will be displayed in the Subscription list, showing:
- Next bill due
- Customer name
- Plan
- Status
- Alert
- Next payment
At the top of the screen, you’ll see a summary showing you whether a subscription is active, in a final billing period, and if a card is due to expire or has expired.

It is also possible to create a new subscription directly from the customer profile screen.
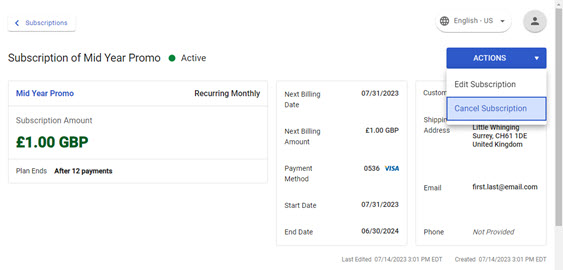
10.3. Cancelling a Subscription
Select the Recurring option from the left-hand menu and locate the subscription you wish to cancel:
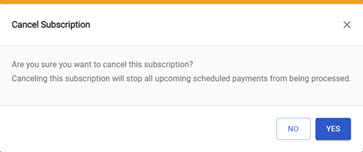
Select 'Cancel Subscription' from the 'Actions' menu:
Click 'Yes' to confirm:
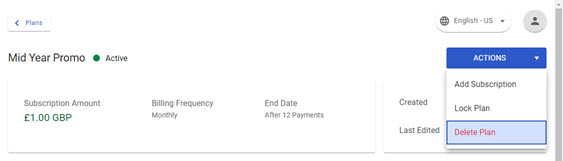
10.4. Deleting a Plan
- Select the ‘Recurring’ option from the main menu
- Click ‘Plans’ and select the plan you wish to delete
- Click ‘Actions’ and ‘Delete Plan’:
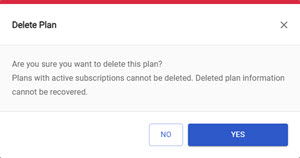
Click ‘Yes’ to confirm. Note that plans with active subscriptions cannot be deleted:
10.5. Locking a Plan
- Select the ‘Recurring’ option from the main menu
Click ‘Plans’ and select the plan you wish to lock.
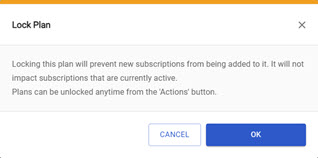
- Click ‘Actions’ and ‘Lock Plan’:

- Click ‘OK’ to confirm. Locking a plan (as opposed to deleting it) will allow active subscriptions to continue and the plan can be unlocked for new subscriptions at any time:
10.6. Viewing Customer Activity
Select the ‘Customers’ option from the main menu and then select a customer profile to view the customer details, along with:
- Cards stored against the customer profile
- Active and cancelled subscriptions
- Customer transaction history
Elavon Terms of Service Ireland
Elavon Terms of Service French
Elavon Terms of Service Spanish
Elavon Terms of Service Dutch
Helping thousands of customers around the world grow their business through payments
Customer service and support
We’re here to help!
Customer service: 0818 20 21 20
8am to 6pm, Monday to Friday
Elavon technical support: 0818 30 31 30
24 hours a day, 365 days a year
Opayo product support: 01 240 8731
24 hours a day, 365 days a year
Copyright© 2024 | Elavon Financial Services DAC. Registered in Ireland – Number 418442.
Registered Office: Block F1, Cherrywood Business Park, Dublin 18, D18 W2X7, Ireland. Elavon Financial Services DAC, trading as Elavon Merchant Services, is regulated by the Central Bank of Ireland.
Helping thousands of customers around the world grow their business through payments
Customer service and support
We’re here to help!
Customer service: 0818 20 21 20
8am to 6pm, Monday to Friday
Elavon technical support: 0818 30 31 30
24 hours a day, 365 days a year
Opayo product support: 01 240 8731
24 hours a day, 365 days a year


Copyright© 2024 | Elavon Financial Services DAC. Registered in Ireland – Number 418442.
Registered Office: Block F1, Cherrywood Business Park, Dublin 18, D18 W2X7, Ireland. Elavon Financial Services DAC, trading as Elavon Merchant Services, is regulated by the Central Bank of Ireland.